Almond Keto Cake


In the kitchen with little time, little money and little people

I’ve been struggling with a winter cold for weeks now and while I’m normally an ‘it will pass’ kind of sick person, I’m about at the end of my tether with this particular cold, so it’s definitely time to dig out the big guns – in this case a chicken broth stellette soup.
The chicken in this recipe is already cooked, left over from Sunday lunch and it’s worth mentioning that the ratios of the spring onions, mushrooms, chicken and pasta can vary. It won’t hugely affect the end result, and it’s better than leaving a random mushroom alone in the punnet in the fridge!

Mushrooms are great for colds and flues apparently, containing cytokines that play an important role in defending the body against viral infections and tumours and help boost the immune system. And I’ve read conflicting advice about the consumption of mushrooms, but it seems that in order to get the most nutrition from them, they must be cooked otherwise they’re undigestable.
According to Chinese medicine, spring onion is good for expelling a winter cold, especially if consumed within the first two days of the cold.
Parsley has high levels of Vitamin C, Vitamin B12, and betacarotene that boosts the immune system of the body and protects it from colds, cough, and other infections.
Chicken is rich in a compound called carnosine, and it’s this that studies suggest helps reduce that stuffy, congested feeling in your nose and throat.
I also like using Stellette or Stelline pasta as they are small and don’t require much chewing and small enough to swallow (great when you have a sore throat) and then they are kind of pretty too!
I might try adding ginger and garlic next time too, not only because of the health benefits but because they might add a little extra flavour kick at a time when you can’t taste much!
Click here for more recipes containing broth
Over the summer our local supermarket was selling off a bunch of live chilli plants, and even though I really don’t like chilli – except in hot chocolate – I love the splashes of red against the deep green leaves and I love the brightness it introduces to my kitchen. The plant itself is one of those that gives more the more you take from it, so we’ve had a healthy harvest of chillies over the last few months, and I’ve been giving them away to anyone who’d have them. I did decide to keep a few though, because I wanted to give one of my chilli-loving friends a little gift of chilli salt.

We use Himalayan pink salt which I tend to bulk buy as it lasts forever, and we use salt for some non-food purposes that make good gifting ideas too, and I can crush it as we need it. I also wasn’t sure how dry the chilli gets itself just by lying on the windowsill, so I popped them in the dehydrator for a few hours till the chillies were properly dry. (They crackle when you snap them.)
I also put the chillies into the Thermomix® (food processor) first so they can be chopped up before I add the salt because I didn’t want the crystals to be broken down too fine.

Just one note here – when you’re blending this up in your food processor, make sure to cover any airholes (in a safe manner). If the air fills up with chilli salt, it’s not a whole lot of fun on your nose or throat or eyes!
I’ve decorated empty herb and spice and other jar lids with washi tape to make it prettier and as these will go into a festive food hamper, I’ve done them in Christmassy colours.


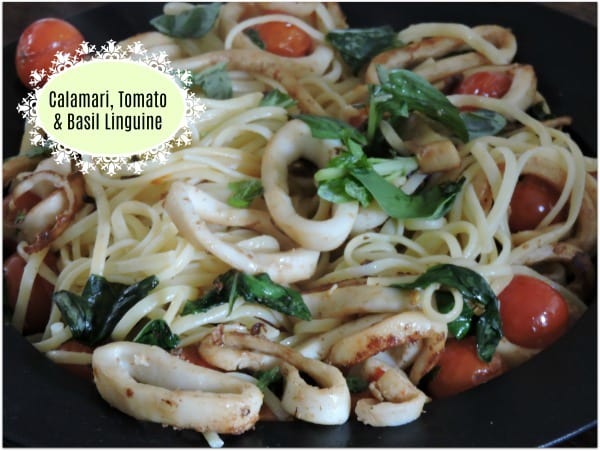
I’ve been enjoying the summer weather lately, and been loving the entertainment opportunities that presents too. When I have guests though, I like having pre-prepared, or quick to prepare meals as I don’t like spending ages in the kitchen! That’s just one of the reasons I really enjoy this Calamari, Tomato & Basil Pasta: it’s easy to prepare before hand, leaving just 10 minutes cooking time required.
I prefer to use fresh pasta when pasta is the main part of the meal, so I’ve used fresh pasta in this recipe. Dry pasta works, but needs to be cooked for longer. It can also be served in a salad, or with quinoa or other starch of your choice.
Use a good quality squid for this recipe too – nothing worse than leathery calamari!
Now, if you want to prepare this meal for later cooking, chop the garlic cloves, wash and dry the cherry tomatoes – halve them if they are the larger variety – wash the squid, clean it and cut it into rings, and chop the basil leaves roughly. Store all the items in the fridge till about 20 minutes before you’re going to cook them, leaving it to warm to room temperature a little.
If your calamari loses a lot of liquid in the cooking, you can pour it out about before adding the cherry tomatoes.
Serve immediately – and if you’re having wine, Calamari, Tomato & Basil Pasta pairs really well with a dry white wine, like a Pinot Grigio – a wine I don’t normally like, but it works fantastically with this. Another alternative is Riesling.

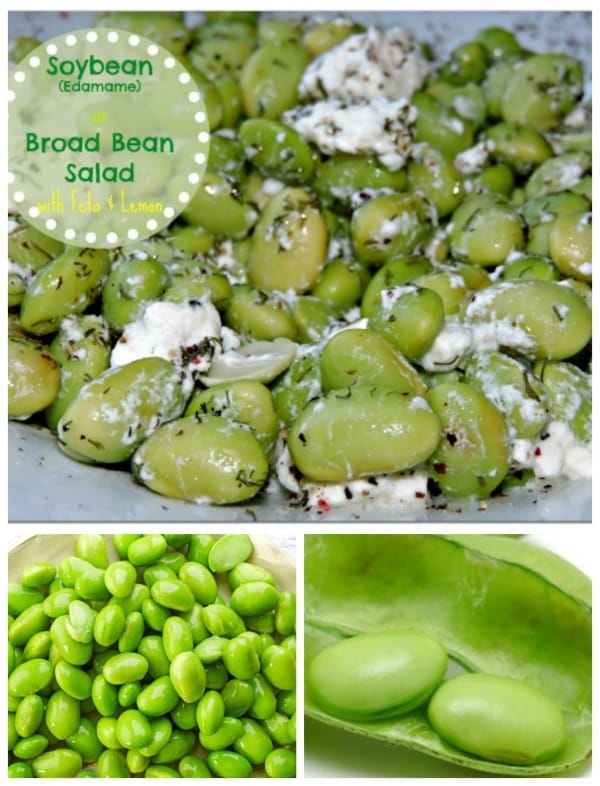
I have a grave and lifelong dislike for beans, especially the tinned variety, but I have developed a love for soybeans, sometimes called soyabeans. Aside from planting some Edamame beans, I’ve discovered that Waitrose sell them in the pods, or anonymous ‘Soybeans’ for £1.50 a bag of 400g! This, in my apparently boring life, has been a very exciting discovery.
Now, soybeans need a longer boil than regular beans to kill off toxins. The packaging on the beans say Microwave for 3 minutes, which I find confusing, but okay, I don’t have a microwave. For this recipe then, I’ve done an 8 minute boil at Varoma temp (120C/248F) to hopefully balance that out, but more importantly, to cook the beans – if I was cooking from frozen, I’d probably go for 10 minutes.
While this recipe is made with dill, and is simply “I want the same again tomorrow” good, the beans are nice with a dash of mint too. Just go lightly, you don’t need much as you don’t want it to overpower the unique Edamame flavour.
Another thing with this salad is that you can do the Feta thing two ways: mix everything, then add the beans, or mix everything then add the Feta. I prefer the first way as the Feta spreads and becomes a dressing of sorts for the beans. The second way, however, is a little ‘neater’ as the Feta doesn’t ‘melt’ as much as quickly. It’s your call.

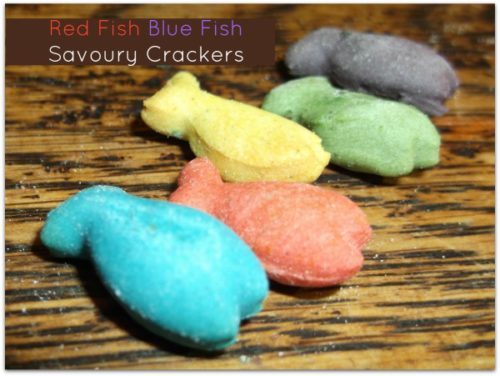
This little One Fish Two Fish Red Fish Blue Fish project was a labour of love! The resulting savoury crackers were fairly stunning though, we think!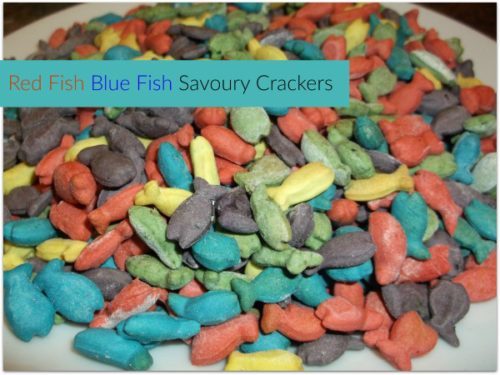
If you know Dr Seuss, you know this book title, I think? One Fish Two Fish Red Fish Blue Fish.
Bizarrely, despite the yellow colouring of the text on Two Fish (on our version of the book), there’s no ‘yellow fish’ reference in the book, but there is a black fish. This may seem irrelevant, except it’s not, when you’re trying to bake multi-coloured and multi-flavoured themed fish crackers!
I know my US friends have something called Goldfish crackers, but we don’t have anything like that, so I had to look for the smallest cookie cutter I could find. I did, in the end, find this one.
I used my regular crackers recipe, and made up a batch of the dough.
Split the dough into equal sizes of the colours you’re going to use. 
I used black, green, yellow, red and blue – just a few drops of a gel based food colouring* worked well so it doesn’t affect either the flavour or make it too wet.
If you’re using the same bowl and don’t want to wash between each colour mixing, do the yellow first, then the blue, followed by the green, then the red and then black.

*This post contains affiliate links. You will not be charged for purchasing through these links.

One of the recipes in this month’s Degustabox was a Chia Mocha, to go with the chia seed samples from The Chia Co. Even though I’m not normally a fan of textured liquids – I don’t even like lumps in my soup – I was keen to try this recipe, because I have a whole pot of chia seeds I don’t really know what to do with! I bought them because I know chia seeds are supposed to be very good for you, then couldn’t figure out what to do with them as I’m not overly keen on either chia jam or chia porridge – too lumpy for me! This recipe was quite surprising though, and is perfect for lovers of coffee with chocolate, or chocolate with coffee – whichever you see a mocha as!
If you don’t give this a good whizz in a food processor, the end result is a lumpy sort of drink – like bubble tea, but really really small bubbles. It’s drinkable if you don’t dislike the texture. 
If you do mix it enough to break down the chia, you’ll end up with a thicker, smoother drink. 
This Chia Mocha is easily adaptable. I changed it to coffee for one, since I am drinking it alone. I just halved the original recipe’s ingredients. I also made it in the Thermomix®, but you can use any food processor. I think it would be simple enough to adjust to your tastes. For example if making it again, I’d probably use regular cows milk instead of coconut milk as I prefer a whiter, lighter coffee. If you’re used to black coffee or nut milks, this will be perfectly fine for you!
The chia seeds will cause the drink to thicken up a bit, making a comforting, but invigorating and filling drink.
Here’s the original recipe from Degustabox and below is my adapted to a single serving version.


This peanut butter slice is adapted from the original Degustabox The Chia Co recipe. I had to make some changes to it as my kids wouldn’t eat cranberries if they were the last food on earth, and human survival depended on them. So I went for the freeze dried raspberries in the cupboard, and filled them out with some cacoa nibs for a raspberry and chocolate flavour to this ‘slice’ which could also quite easily be called a flapjack, except it has no sugar or butter and isn’t baked.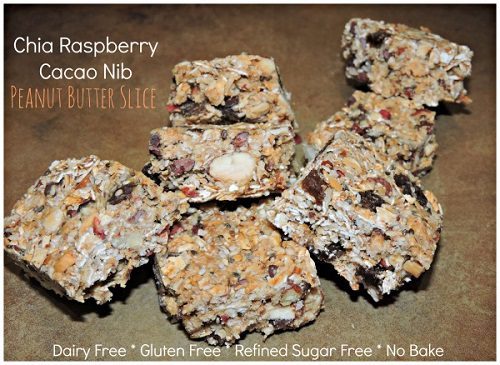
So, if you want a sugar free, butter free, no-bake flapjack, congratulations. You’ve found it in the form of a peanut butter slice.
I must then immediately caveat that by saying that in the 0 – 4C temperatures we’re having at the moment, these hold really well straight out the fridge. It’s likely that in hot temperatures, you could end up with a delicious peanut butter muesli. Try it and let me know?
Here’s the original recipe from Degustabox:
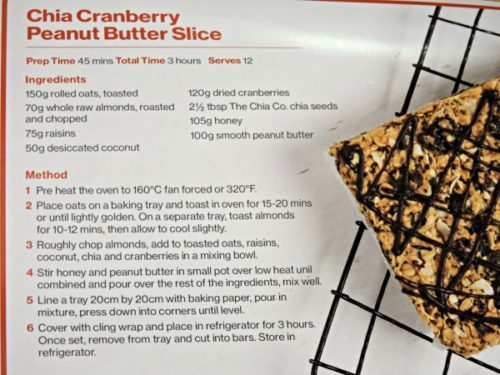
And here’s the adapted peanut butter slice version.
