Honey Cookies

Honey Cookies

It’s national Winnie The Pooh day on Monday the 18th of January and we love Winnie the Pooh in this house. We’ve visited the real 100 Acre Woods and we’ve had a Winnie The Pooh birthday party and my kids have been playing Pooh Sticks since they could stand up straight, so really it’s only obvious that we’d have to do something to celebrate Winnie the Pooh’s special day!Honey Cookies

I’ve made this recipe a few times, because they’re honey cookies, and bears love honey! And so do my children. They are really tasty on their own, but my little ones love them with chocolate chips on top and my personal favourite is with glacé cherries on top. It’s just deliciousness all round.Honey Cookies

The original recipe from the 1979 The Pooh Cook Book You suggests you can top it with almond slivers. I’ve reduced the sugar too, with no ill effect, though that’s probably because we eat them before they can go stale, which is what the sugar helps slow down.

Honey Cookies
 
Prep time
Cook time
Total time
 
Serves: 40 cookies
Ingredients
  • 230g self raising flour
  • pinch of salt
  • 115g salted butter
  • 80g brown sugar
  • 1 egg
  • 45g honey
  • 1 tsp vanilla essence
  • almonds (optional)
  • choc chips (optional)
  • glacé cherries (optional)
Instructions
  1. Preheat the oven to 180C/350F
  2. Add flour, salt, butter, sugar, egg, honey and vanilla essence to the food processor and mix till it's all well combined (Thermomix®: speed 5/30 seconds)
  3. On a well floured surface, and with well floured hands, shape balls the size of large marbles and space them out evenly on a tray. They will expand in the oven.
  4. With your finger make a dent in each ball and fill it with the optional extras or leave it as is
  5. Place in the oven and bake for 13 - 15 minutes depending on your oven
  6. They will still be really soft when they come out the oven, so leave them to cool entirely before transferring to a biscuit tin

Isn’t it funny

How a bear likes honey

Buzz! Buzz! Buzz!

I wonder why he does

Garlic & Herb Pull Apart Bread Recipe (Thermomix®)

I’ve tried to make pull apart breads on, well, more than one occasion, but I’ve never found them to be perfect. They’ve just never been ‘right’ – till today. Today I made a most beautiful garlic & herb pull apart bread. It was light, fluffy, airy and delicious. My kids loved it.  I loved it. Now I’m writing it all down step by step so hopefully next time I make it, it’ll be as good! I have a hankering to try this with bacon too. Just saying.

Garlic & Herb Pull Apart Bread

You can make this with or without the cheese, and you can vary the herbs to your preference. The main thing is to make sure you add some of the garlic butter to the bottom of the baking dish so that it seeps through to make these beautiful, fluffy and delicious breadrolls for a tear & share bread.

Garlic & Herb Pull Apart Bread Recipe
 
Prep time
Cook time
Total time
 
You can make this bread with any recipe you prefer, really, but this one is adapted from the Bestest Breadrolls recipe on the Thermomix® community.
Author:
Recipe type: Side Dish, Bread
Cuisine: BBQ, Bread
Serves: 8 - 10
Ingredients
For the bread
  • 10g dry yeast
  • 1 teaspoon salt
  • 1 teaspoon sugar
  • 510 g bakers flour
  • 30 g garlic flavoured olive oil
  • 310 g warm water
For the garlic butter
  • 4 garlic cloves
  • 15g flat leaf parsley
  • 60g parmesan or other cheese
  • 60g butter
Instructions
  1. Add all the ingredients to a clean Thermomix® bowl.
  2. Mix at speed 5 for 10 seconds, then knead for 90 seconds using the dough setting.
  3. Oil a glass bowl and place the dough inside. Cover the dough and set aside to rise to double it's size.
For the butter
  1. Add the garlic, parsley and cheese to the bowl and mix on speed 5 for 8 - 10 seconds.
  2. Add the butter and melt at 50C/Speed ½ mins.
  3. Pour a third of the melted butter mix into an oven safe dish..
  4. Take the dough and split it into 8 - 10 balls. Put them on top of the butter mix in the dish, making sure they touch lightly. Drizzle over the remaining butter mix.
  5. Turn the oven on to 180C and put the breadrolls into the oven (while it's still cold).
  6. Bake bread for 20-30 minutes depending on your oven. It should be golden brown.
  7. Remove from oven dish so the base doesn't get soggy.

Easy Thermomix® Meringues

Silky Thermomix Meringues

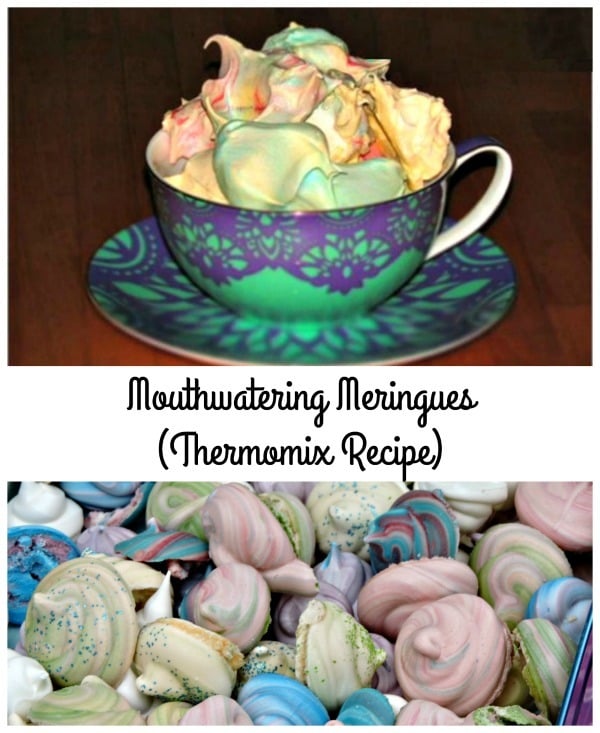
I make our mayonnaise, and many other things from scratch, often requiring only the yolk of an egg. I hate seeing things go to waste, so I try to make something with the left over whites. While this isn’t by any means a healthy recipe, it is a lovely one. If you don’t have a Thermomix®, here’s my non-Thermomix® recipe.

Unless you eat them all in one go, the Thermomix® Meringues will last in the cupboard for weeks, if not months!

We put them in the lunch box as snacks sometimes, or have them as desert with cream and fruit – absolutely yum.

To make the colours like in the image above, you need to separate the meringue mix into different bowls and very gently stir through the food colouring. Then use a spoon to move the batter into an icing bag, putting different colours next to each other rather than on top of each other.  As you squeeze it, the colours will mix and make pretty meringues.

If you make meringues with brown sugar they’ll come out in this golden-ish hue rather than white.

Silky Thermomix® Meringues

Easy Thermomix® Meringues
 
Prep time
Cook time
Total time
 
You can adapt this recipe as far as you like, in terms of amounts used, so long as you use 110g sugar to each egg white. In a TM31, I wouldn't be inclined to go beyond 6 egg whites however. I have successfully made this with just one egg white too.
Author:
Ingredients
  • 3 Egg-Whites, room temperature
  • 330g White sugar (brown if you don't mind them not being white)
  • Pinch of Salt
Instructions
  1. Put the sugar in the mixing bowl and pulse for 10 seconds on Turbo.
  2. Place the butterfly in the bowl and add the egg whites along with a pinch of salt.
  3. 'Cook' at 37C for 7 minutes on speed 2, no MC.
  4. Leave the mix to cool for 10 minutes with the lid off.
  5. Mix again for 7 min/speed 2.
  6. Either pipe the mixture with a piping bag into small circles, or a large 'pie' for pavlova-style deserts, or dollop the mix onto a baking tray in spoonfuls, leaving space for expansion.
  7. Cook for about 60-90 minutes on 100C° to 120 min at 80C° depending on your oven and meringue sizes - as well as how chewy you want it.
  8. When finished, leave in the oven to dry out while cooling down.


*original recipe found on the Thermomix® forums