Continue reading “Creamy Garlic Chicken With Sundried Tomatoes and Spinach Pan”
Winter Vegetable Medley Soup
Amazing Pumpkin Parmesan Dip
Another fantastic centrepiece for a party, a pumpkin filled with Pumpkin Parmesan Dip looks great and is versatile for crackers and veggies alike. You can adjust the amount of parmesan, or even substitute for a cheese you prefer – I can’t imagine there’ll be too much difference to the end result.

My kids are particularly antsy about raw garlic – they can pick it out of anything – so if you prefer, you can saute the garlic for three minutes at 100C. I only do that if I’m making it, especially for my children.
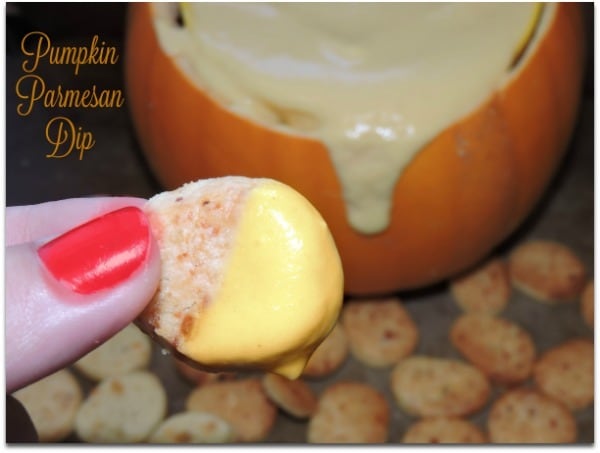 I decided to put the dip into a bowl and hover the bowl inside the mouth of the pumpkin. I don’t know if that’s necessary or if you can just put it in the pumpkin, but I decided it would be easier in this instance to keep cool, and that the pumpkin itself was reusable for a number of days and other recipes if not. Also, if you’re particularly skilled at carving (I’m not!) a fake candle inside, under the dip could look very pretty too.
Pumpkin Parmesan Dip Recipe:
- 1 garlic clove
- 50g parmesan
- 100g cream cheese (I use full fat)
- 1 tsp paprika
- 1 tsp salt
- 400 - 500g cooked pumpkin
- Add 1 clove garlic 5 seconds/ speed 5
- Add parmesan 10 seconds/speed 10
- Add cream cheese, paprika, salt and cooked pumpkin 30 seconds/ speed 4
- Scrape down sides 1 minute/ speed 10
- Set aside to firm up again, and serve
- Finely chop the garlic, or crush it and add to a food processor
- Grate parmesan and add to the garlic.
- Add cream cheese, paprika,salt and cooked pumpkin
- Mix following your food processors instructions till it's all well blended and smooth.
- Set aside to firm up again, and serve.
Try these Halloween recipes too!
The cheese biscuits in the images are round versions of these cheese straws.
Quick Pancake Mix Recipe
Through all the milestones of life – birth, breastfeeding, parenting choices, weight management, relationship rise and decline – I try to remain non-judgemental and realise that everyone has their own path to walk, but every year, around this time (early February) my inner judge and jury come out in full force when I walk through the supermarkets and see ‘pancake mix’ sold in single use plastic bottles.
I’m sorry. I really am. I can’t put my judgemental face away right now.
Our local supermarket has a huge display of pancake mix today. It’s £1 for a bottle that makes 6 pancakes. SIX.
The ingredients are: Wheat Flour, Sugar, Palm Oil, Whey Powder (Milk), Dextrose, Dried Egg Yolk, Salt, and you’ll need to add oil for cooking.
Yay for the unnecessary deforestation. Not to mention the plastic that ends up in landfill.
(See, I told you this makes me all judgey! )
If you were to, oh, I don’t know, make your own pancake mix your ingredients would be flour, eggs, milk, salt and a bit of oil. Then you mix it together. My three year old can do it!
And to make six pancakes? Your ingredients – assuming you don’t go for caged hen eggs or the cheapest possible flour – will cost you the grand sum total of 27p. A little over 1/4 the cost of those ‘convenient’ little bottles. If you’re going all out luxury and putting two eggs in the batter, you’re still looking at 35p for six pancakes. 
The only time I can imagine justifying buying pancake mix is if you’re hiking, carrying your week’s food with you and you wanted to make pancakes one morning, on an open fire, high up in the mountains. And even then I’m not convinced.
Okay. I’m going to step off my pedestal and give you the pancake recipe I’ve been making since I was a child, since my mom took us high up into the mountains (by car) to make pancakes on a camping stove in the snow.
Some pancake recipes call for one egg, some for two. I like doing two with savoury pancakes as it makes them a bit thicker, and sturdier, and better for holding something like ham and cheese or chicken mayo. One egg is fine for holding sugar and cinnamon or chocolate spread or similar light fillings. Or, hmmm… bananas, cream and caramel.
The recipe below is for 6 pancakes which is generally enough for the three of us. You can double or triple or x100 it without much effort – just increase the mixing time.
If you’re not sure how to cook a pancake, the best way of learning is seeing, so have a look at these youtube videos!
- 100g plain flour
- 1 or 2 eggs
- 300 or 280g milk (depending on how many eggs you use)
- 10g (1tbs) vegetable oil
- a pinch of salt
- Cinnamon, sugar and lemon juice to taste
- Add all the ingredients into a bowl and whisk. It's easier if you use a whisk or an electric beater, but even a fork will do it eventually. Mix till it's all combined and you have a runny, smooth, lump free batter.
- If you're using a Thermomix®, mix for 10 seconds/speed 5
- Turn the stove up to a medium high heat, and pour into a frying pan enough batter to cover the base. I use a standard sized soup ladle, about half full for each pancake.
- Let it fry for a minute or so, till the edges start to brown, then use a spatula or flip over and cook the other side for about 30 seconds
- Tip the pancake onto a plate and sprinkle cinnamon, sugar and lemon juice over
- Repeat till you've used up all the batter
- Having added oil to the batter, you shouldn't have to add any to the pan, but pans differ, so if the batter sticks add a dash of oil.
- I use brown sugar because I prefer it, but it's also really nice with castor sugar
- If you really don't know how to cook pancakes, there are hundreds of videos on youtube that can help you.
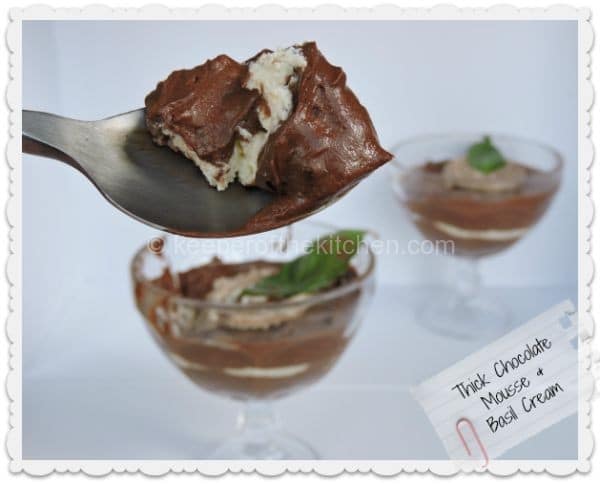
Thick Chocolate Mousse & Basil Cream
I love Basil. It’s such a sensory herb, with the ability to transport you to just about anywhere – usually in Italy.
I also love chocolate, and one of my favourite memories is from my honeymoon, some 10 and a bit years ago, where we spent time backpacking through Italy, from Sorento through to Bergamo. Our last night was in a hotel in Turin, and by the time we got there we were pretty worn out. The 4-star hotel had an amazing jacuzzi in the bathroom, and with promises to return one day, we didn’t venture further than the cafe on the corner.
This particular cafe, however, had a delicious selection of home made chocolates and ice cream, and I fell in love with the combination of Basil and Chocolate. No, it’s not one you come across often, but it works – trust me, it works.
I recently agreed to participate in a challenge where I had to come up with a recipe that speaks to the taste of Italy, and I can’t think of much that speaks of Italy like Basil does, so here is my contribution: Chocolate Mousse with Basil Cream – and here is my advice: don’t knock it till you try it!

This is an incredibly rich mousse. We had two people (including two children) sharing the two ice cream bowls of mousse & cream in the pictures, and it was still a lot. So it’s a great sharers dish.
We hope you love the Chocolate Mousse & Basil Cream as much as we do!
- 335g double cream
- 10 fresh basil leaves
- 15g icing sugar
- 150g chocolate
- 2 large eggs, separated
- 2 tablespoons sugar
- 1 teaspoon vanilla extract
- In a sealable container, add 200g cream and whole basil leaves together.
- Cover and put in the fridge for 5 hours. After that time, remove the basil leaves and discard
- Add the icing sugar to the cream and whisk to stiff peaks. (I find it easiest here to transfer into a piping bag, and set aside.
- Melt the chocolate in the microwave, on a double boiler, in a bowl nestled inside a pot on the stove top (making sure not to get any water in) or however you normally melt chocolate.
- While it's melting, whisk the egg whites to stiff peaks, adding the sugar slowly as you whisk, then put the egg whites in the fridge.
- Next, whisk the cream to stiff peaks, and place in the fridge.
- Finally, in a large bowl add the vanilla extract to the egg yolks and mix until smooth. Pour the melted chocolate slowly in to the egg yolks, stirring all the time.
- Next, add the cream to the egg and chocolate mix, and stir till it's all combined.
- Finally fold in the egg whites. Do not beat, whisk or over stir this as doing so will cause the mousse to collapse. Follow instructions below for combining.
- These instructions are for one bowl. If you have two, melt the chocolate in one and do the whisking in the other.
- Place the egg whites and sugar in the Thermomix® bowl and whisk with the butterfly speed 4 about 1 minute. Keep an eye on it - the freshness of your eggs and the temperature will affect how long you need to whisk this for, and you don't want it to collapse again, so just stop when you reach stiff peaks.
- Scoop into a bowl and set aside in the fridge
- Wash out the bowl and dry thoroughly.
- Pour the cream in and add the butterfly again. Whisk the cream for about 30 seconds/speed 4. Again, keep an eye on it - freshness of cream and starting temperature of cream will affect how long it needs to be whisked for. You don't want butter!
- Set aside the cream, and wash and dry the bowl.
- Add the chocolate to the Thermomix® bowl and chop speed 5, 10 seconds.
- Heat to 50C/Speed 2/ 3 minutes. Meanwhile in a large bowl, mix the egg yolk and vanilla extract and stir to combine. When the chocolate is melted pour in a thin stream whisking together. (Don't pour the egg into the hot chocolate or you'll end up with scrambled eggs.)
- Add the cream to the bowl, whisking to combine.
- Finally, add the egg whites and gently fold them in. If you whisk or stir too vigorously you'll knock all the air out of the egg whites and your mousse will fall flat.
- Smaller ramekins or glasses are better for this desert as it is very rich.
- Place a layer of chocolate mousse in your serving dish and flatten out.
- Next you need a layer of basil. I find piping it around the edges first then in through the centre the easiest, before adding a final layer of chocolate. If you're confident in your piping skills, pipe a pattern of the basil cream on top - I messed it up first time, so scooped it up again, hence mine looks a bit chocolatey.
- You can serve it immediately for a light and fluffy mousse, but it's equally delicious, if a bit denser and less airy a few hours later.
Self-Saucing Steamed Pear Pudding With Orange Butter Sauce
I bought pears a few weeks ago thinking my girls would eat them, but they were hard, and stayed hard, till they started looking beyond their best, so I decided to make a baked pudding with them. I have been trying to use my Varoma more, so thought a steamed pudding would be nice too, specially since this ‘summer’ is hiding behind thick rain clouds today.

I have no idea how you would steam a pudding on the stove top, but if you do, I’m sure this will be easy to make even without a Thermomix®.
I also think the flavours in this can easily be adapted – adding cloves, raisins, cardamom as you like. And I like to serve this with home made clotted cream or ice cream.
- 2 pears, cored and chopped in rough cubes
- 25g butter
- 20g sugar
- teaspoon cinnamon or all-spice
- juice of one orange
- 125g butter
- 110g caster sugar
- 2 eggs
- 130g self-raising flour
- zest from 1 orange
- Chop pears into cubes and place in the Thermomix® bowl.
- Add butter, sugar and spices and orange juice and cook 5 mins/ Varoma Temp/Speed 1
- Spoon into rammekins or heat-proof dishes
- In the Thermomix®, whisk the butter and sugar together for 50 seconds/speed 4
- Add the eggs, self raising flour and zest and beat together for 30 seconds/speed 4
- Spoon into rammekins, above the fruit
- Place the rammekins into bottom 'shelf' of the Varoma and put the lid on
- Add water up to the 1l mark in the bowl, place the Varoma on top and steam for 25 mins/Varoma Temp/Speed 3
- Turn upside down onto a serving dish and serve with clotted cream or icecream
French Onion Soup – Kids In The Kitchen
This week my home schooled kids are learning about France, because we’re heading off to Disneyland Paris in a few weeks. They don’t know this though – they think we’re going to Paris to learn about ‘old stuff’. We will spend a day in Paris too though, just to make sure their learning wasn’t for nothing.
One of the things you learn when learning about France, beyond capital city and population size, is food, and since we have very little by way of groceries at the moment (someone left the car door open, leaving the light on over night and us with a flat battery today. RAC finally reached us well after bed time tonight, so grocery shopping tomorrow!) I was quite literally faced with four onions, two day old bread and some cheese to come up with a dinner idea… you can see where I’m going with this, I’m sure.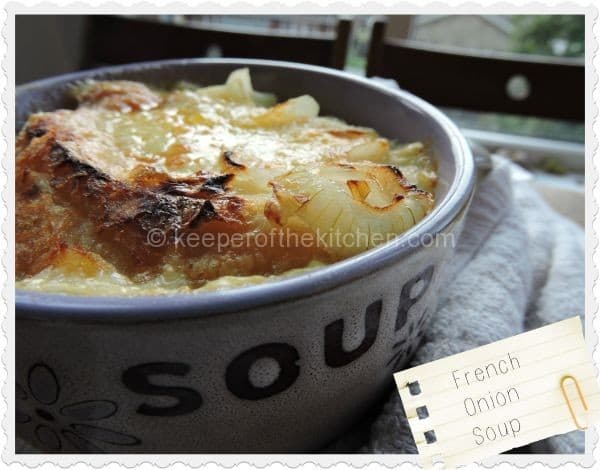
One of the books we’re using for our studies at the moment is called France: Food and Celebrations* by Sylvia Goulding, with a bunch of recipes for kids to make, so while I could do this with so much more ease in the Thermomix® in 15 minutes, I still feel it’s really important for my kids to learn to cook traditionally first, so that they can understand the basics of cooking – and from there the sky is the limit.
For this French Onion Soup, I didn’t add the traditional Gruyere, so the kids’ just had a strong cheddar on theirs. I added some Chaource to mine. Chaource is a French cheese, originally manufactured in the village of Chaource in the Champagne-Ardenne region. Chaource is a cow’s milk cheese, cylindrical in shape at around 10 cm in diameter and 6 cm in height. It has a soft inside, like an already baked Camembert, and has a beautiful very mild blue cheesy tang to it. It’s really lush, a very unknown cheese in the UK and easily available from Tesco and just works in this soup. (Sorry French traditionalists!)
I had my 5 year old slice the onions (we use this ‘safe’ Pampered Chef slicer) and then stir them on the stove till they were translucent. Meanwhile my 3 year old layered bread and grated cheese in soup dishes. I poured the water in to make the soup, transferred everything to the grill and removed it from there again.
I should add here that this is probably a meal for two, but for one adult and two children it’s ample. Considering you’re eating a slice of bread and an onion with some cheese, it’s incredibly filling, and very rich.
- 2 large or 4 small brown onions
- large dollop butter (20g)
- 1 teaspoon sugar
- 1.5 litres beef stock (reduce to1000g if using TM31 Thermomix® and cook without MC)
- 4 - 8 slices day old bread
- 100g shredded cheddar cheese
- 100g other cheese (for kids I leave this one out and use just cheddar as that's rich enough for them) Gruyere or Chaource
- salt and pepper to taste
- Peel and thinly slice onions.
- Add butter and onion to a pan and sauté till they are translucent and beginning to brown, about 5 - 8 minutes.
- Add stock and simmer for 25 minutes.
- Meanwhile, grate the cheese, and layer cheese and bread in an oven proof soup bowl (Individual bowls are better than one serving dish) Start with a thin layer of cheese, top with bread, another layer of cheese, and end with a layer of bread, reserving some cheese for later.
- When the soup is cooked, spoon onion and soup into soup bowls and top with remaining cheese.
- Place under grill for 5 - 10 minutes, keeping an eye on it till the cheese is browned. The dishes will be hot, so transfer carefully to a counter.
- Add one or both cheeses to the Thermomix® (drop over running blades) speed 5, 10 - 15 seconds.
- Clean the bowl and set the cheese aside.
- Add the onions and butter to the Thermomix® and blend 10 seconds speed 4.
- Sauté for 8 mins/100C/spoon speed. (If you can, do this on the stove, I do prefer the flavour)
- Add the stock (remember to keep to the limits in the Thermomix®, so 2000g for TM31)
- Cook reverse speed, Varoma/15 mins, without the MC
- Meanwhile in the soup dishes, start with a thin layer of cheese, top with bread, another layer of cheese, and end with a layer of bread, reserving some cheese for later.
- When the soup is cooked, spoon onion and soup into soup bowls and top with remaining cheese.
- Place under grill for 5 - 10 minutes, keeping an eye on it till the cheese is browned. The dishes will be hot, so transfer carefully to a counter.
- Enjoy
Brandy Butter Christmas Cake Icecream
I know you’re wondering what on earth I’m doing posting a Christmas recipe in August, but since I’m in the Northern Hemisphere, and it’s summer here, now’s the right time for me to test something I’ve been toying with in my mind for ages.
We spent last Christmas in Australia, and Christmas day was really very hot, as Perth is wont to be late December. I bought the Christmas pudding my mum used to buy and made her special brandy sauce and we ate our Christmas pudding – but we ate it because my mum used to make it and she wasn’t there anymore, but it lead me to thinking that it would be great to have the same flavours, but in a more seasonally appropriate fashion.
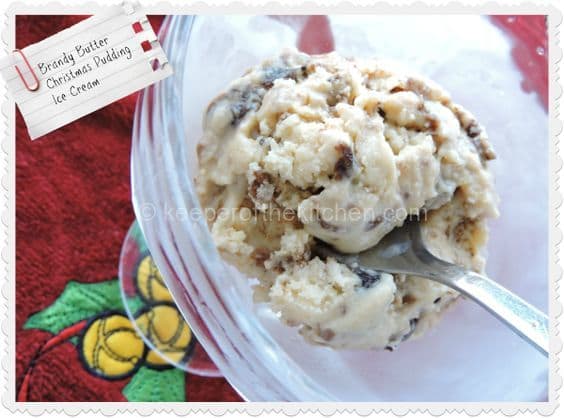 A quick Google showed me that my genius idea of brandy butter ice cream isn’t original (isn’t it sad when that happens 😉 ) but I looked at a few recipes, made some adjustments and came up with this below.
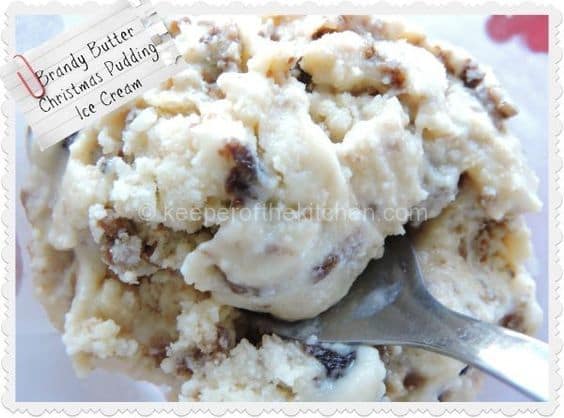
I don’t have an ice cream maker either – just to add to the complication, so you can make this recipe with any and all or absolutely no gadgets. As it happened, I also didn’t have butter, so had to first make that from some extra cream!
- 130g butter
- 100ml/95g brandy
- 300ml/300g milk
- 2 egg yolks
- 175g light soft brown sugar
- 150ml /150g double cream
- Christmas Pudding (as much as you have)
- Melt the butter on a stove till it's just browning, then remove it so it doesn't burn.
- Add the brandy and set aside to cool.
- Warm the milk in a pan, while you whisk the yolk and sugar till it is lighter in colour. Don't let the milk boil.
- Pour the hot milk over the sugar mixture, whisking continuously, then return to the saucepan set over a low heat. Cook for 3-4 mins, stirring the whole time until the custard thickens enough to coat the back of the spoon.
- If you've whisked the sugar mixture in the Thermomix®, add the hot milk to the sugar mixture and cook on 60C/3:30mins/speed1. This should make a custard, thick enough to coat the spoon.
- Whisk the double cream to stiff peaks. Mix the brandy butter with the custard then mix in to the cream. Make sure it's all combined well, then put it in the freezer.
- If you have an ice cream maker, follow the instructions to make ice cream. If you don't, add it to your Thermomserver or any other dish and remove from the freezer every half hour to stir and break down all the crystals.
- After 5 times - about 2.5 hours - crumble the Christmas pudding into the ice cream mix together, and leave to set till you're ready to serve. (If you're using an ice cream maker, follow their instructions on adding bits.)
- Remove 10 - 15 minutes before serving, depending on your outside temperature, and enjoy.
This recipe features in A Very Thermie Christmas, where you can find it and 50 other recipes perfect for a Thermomix® assisted Christmas. Read more about it here.
Cacao Nib Latte
It’s a dull and dreary morning here on the Isle of Wight. It’s raining and I can barely make out the line between the sky and the ocean. Job prospects for my husband are still thin on the ground and I am feeling the pressure of being sole breadwinner for the family.
I need a pick me up, but a true pick me up, not something that’s going to spike my blood sugar and crash me down further.

Well, this recipe might be a false economy, since dairy blocks the absorption of flavenoids (or something like that) meaning the full effect of the cacao nibs won’t be felt, but it tastes good and after drinking this, the whole family managed to get out of bed and we’ll be off for a stroll on the beach as soon as the rain stops.
There’s a lot of room for movement on this recipe. I will try it with almond milk, or coconut milk next, and maybe with rapadura or honey for sweetening. But for today, this was perfect. Delicious, smooth, And a real lift to the mood. 
If I didn’t have to share it with the kids, I’d probably add a pinch of cayenne pepper too, like a Mexican hot chocolate, with it’s aphrodisiac qualities… hmmm… save that for a rainy day when the children have left home 😉
For these Cacao Nib Lattes, I use the Suma brand here, but obviously you can use whatever works best for you. These are unroasted, and I don’t roast them, but you can.
- 30g cacao nibs
- ½ vanilla pod
- ½ tsp cinnamon
- seeds from 1 cardamom pod
- cream to top (optional)
- 500g milk
- 5g sugar/rapadura
- Add the cacao nibs and vanilla pod, cinnamon and cardamom seeds into a blender bowl and chop to a powder (Thermomix®: speed 6 for 20 seconds.
- Add milk and sugar and mix on speed 4/7 mins/80C
- Pour through a nut milk bag, or into a cafetiere to strain, then pour into cups.
- Top with cream, or not. It's delicious either way.
Onion Soup Thermomix® Recipe
This onion soup my mother used as a base for her Vranameer Chicken for many years. She, of course, didn’t use a Thermomix®, so I’ve just adapted it for a simple, tasty, filling soup, perfect to eat as a soup, or as the basis for a casserole.

- 25g butter
- 500g onion (about 3)
- 2 tsp sugar
- 2 garlic cloves, sliced
- 125ml white wine
- 500g vegetable, chicken or beef stock & water mixed depending on the stock you use.
- salt & pepper to season
- Place the butter in the Thermomix® bowl and add 500g onions, halved.
- Mix at speed 5 for 5 seconds till they're chopped, and put on speed 2/100C to sweat the onions for 4 minutes. (If you're doing this step on the stove, fry until the onions are translucent but watch that they don't burn. Add the sugar and leave to caramalise, about 5 minutes, but keep an eye on it.)
- Add the sugar, and cook for 10 minutes, speed 2, 100C
- Add the garlic, wine and stock and cook for 15 minutes, speed 2, Varoma.
- Taste and season, and serve with fresh bread (although again here, my husband prefers it kept in the fridge for 24 hours, and then heated and served. I like it as is.)


