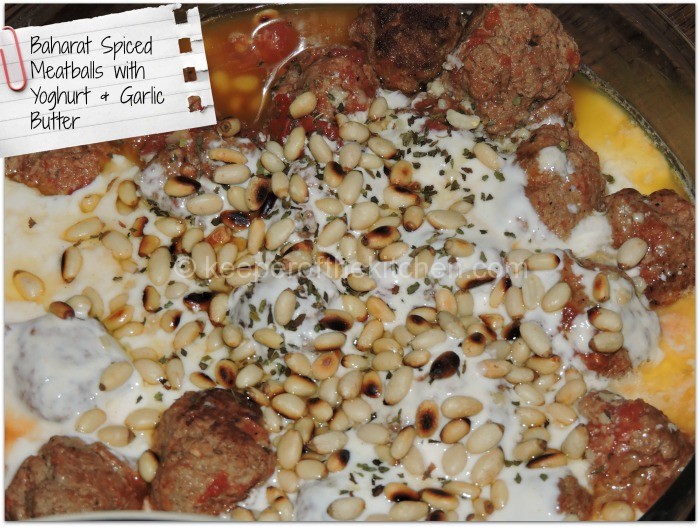
Baharat Spiced Meatballs With Yoghurt And Garlic Butter Sauce
I was given a selection of mixed pices recently, and I’ll be honest and confess that I’d never heard of most of them. The first one I wanted to try and cook with was Baharat. If you Google Baharat you’ll find a number of versions based on area, but this one was from a company called Spice Kitchen and according to their website it’s a blend of cloves, black pepper, cumin seeds, nutmeg, paprika, cardamon & cinnamon.
I spent a whole afternoon perusing Pinterest and the rest of the web trying to learn the best use of this spice, and when I finally sat down to meatballs in a yoghurt and garlic butter sauce at dinner time, I was thrilled with the result. I didn’t find this a spicy dish at all, and the dressing was perfect with plain, fluffy white rice. We also had another dish at the table which was a lot more spicy, and this sauce provided beautiful relief for the tongue.
As someone who didn’t grow up with a lot of spices, and who can’t really handle much more heat that black pepper – or a light wasabi – and who’d never choose to eat at an Indian restaurant, for example, I’d never have considered experimenting with these spice until a few years ago, and sitting eating this meal, I savoured every mouthful 
I think my favourite thing about this dish is that it’s not just one flavour all the way through. Each mouthful is different, with hints of mint, crunchy pine nuts yoghurt and the Baharat meatballs coming through in different bites. Hmm… sitting here writing this, I’m salivating – I’m going to have to buy some more lamb mince!
- 400g ground lamb
- salt and pepper for seasoning
- 1 small onion, halved
- 15g Baharat Spice (adjust seasoning to taste)
- 100g (100ml) plain yoghurt (try this recipe)
- 25g butter
- 1 clove garlic, crushed
- 1 tsp Mint (fresh or dried)
- 50g pine nuts
- Oil for frying
- Rice to Serve
- Switch the Thermomix® on Speed 4 and drop the onion halves on athe blades for a few seconds.
- Open the lid and add the minced lamb, salt and pepper and Baharat Spices. Mix Speed 4/10 seconds.
- Oil the Varoma
- Form small egg-yolk sized meatballs and place them in the Varoma. (You can also do these the 'normal' way on the stove if you prefer them being browned)
- Fill the bowl to the 1 litre mark and put the Varoma in place. Cook on Varoma temp, speed 4 for 20 - 25 minutes.
- (If you're having rice with this dish, add it after about 10 minutes. Add the rice in the internal steamer for the remaining 15 minutes.)
- Meanwhile, on the stove, heat the pine nuts till they start releasing their aroma. Toast them lightly but watch that they don't burn - mine in the pictures are a little burned!
- Next melt the butter and add the garlic, and finally warm the yoghurt. DO NOT let it boil or split, just warm it.
- Move the meatballs into a serving dish.
- Pour the yoghurt over them, then drizzle the garlic butter, top with pine nuts and mint.
- Serve with rice.
- Chop the onions finely, and add the spices, salt and pepper and mince with the onions in a bowl. Mix well till all combined.
- Form small egg-yolk sized meatballs and place them in a hot pan. Cook for about 15 minutes, turning ocassionally to get it browned on all sides and cooked through.
- In the meantime, cook your rice according to manufacturer instructions.
- On a baking tray, or on another plate on the stove, toast the pine nuts but watch that they don't burn.
- Next melt the butter and add the garlic, and finally warm the yoghurt. DO NOT let it boil or split, just warm it.
- Move the meatballs into a serving dish.
- Pour the yoghurt over them, then drizzle the garlic butter, top with pine nuts and mint.
- Serve with rice.
The inspiration for this recipe came from this original
SmoothPacks Reusable Yoghurt & Smoothie Pouches
I’ve been making my own yoghurt for a few years now, and my yoghurt recipe is in fact one of the most popular recipes on this blog, dating back almost two years! In that time I’ve been using a reusable pouch system that I was perfectly happy with and have recommended to many, but last week I discovered something new and I am in make-your-own-yoghurt-smoothies heaven, seriously. I cannot recommend the SmoothPacks Squeeze Pack System highly enough.

When you buy a kit, you receive the Smoothpack ‘Station’ – the bit you fill up with your babyfood, yoghurt, smoothie or whatever else you’re making – and you receive 4 x 125ml pouches and two 250ml pouches.
Inside the plunger bit for the Smoothpack Station you’ll find all the accessories – the nozzles and cleaning clips – safely stored – this is awesome for storage, and not having random bits lying annoyingly around the kitchen drawers.
The plunger has a spiral ridge all the way around it that slots in to place and runs down the ‘track’ as you turn it, meaning you don’t end up with yoghurt (smoothie, babyfood) down your front if you get the angle wrong. In fact, the gliding motion is so smooth, my 5-year old insists on doing it.
Rather than one nozzle that means you fill your pouches one at a time there are four nozzles and you can fill them all at the same time. You fill the Station with 500ml of whatever, and push, filling four pouches at the same time. If you only want to do one or more at a time though, you can just put the stopper (that lives inside the plunger) in place, and seal it up. Essentially it takes about 10 seconds to fill four though, so it’s a fantastic time saver.
The thing people always ask me about reusable pouches, however, is how you clean it. These pouches have a seam down the side that you can open to clean. What also lives inside the plunger are four alien looking plastic thingies that you put inside each pouch and wedge into the dishwasher or drying rack so that the pouches can wash inside. It’s really clever.
The set also comes with two spoons that clip to the lid of the pouches so that you can take them out and about with you for spoon feeding your baby, if that’s your thing, or in my children’s case, feeding your younger sister!
We use our pouches for yoghurt, and in this particular instance I also used the Easyo fruit packets to flavour the yoghurt. I filled about 45oml of plain yoghurt and topped it off with 50ml of fruit compote. Mix it together with a spoon (you can also use a stick blender to liquidize or puree) and put the plunger in place. Open the nozzle lids and fit the pouches securely on before twisting the plunger gently and watching the pouches fill. Screw the lids on and wash the plunger, ready for next time.
The only negatives I can mention for this product is that since it is quite new to the UK, I can’t seem to find the option to buy pouches only at the moment, although spare sachets will be available for the price of £6.95 for 4 Smoothpacks and 2 spoons
If you’re in the UK you can pick this amazing, sleek and easy to use and store refillable pouch system up at Cuckooland for £19.99 (with £4.95 delivery) and £5 off your first order when you sign up for their newsletter. Click here to buy.
If you’re in the US you can find it at Amazon, for $34.99.
Stewed Fruit For Breakfast
 I grew up a military child, which meant we moved around a lot. Whether it was normal or due to my dad being an officer, I don’t know, but every time we moved cities we had three weeks in hotels, and I loved it. I still love hotels to this day, even if they’re down the road from my house, a break away in a hotel is a mini adventure, filled with excitement and newness of change. It’s wonderful.
One of the things I remember most in moving from Namibia to South Africa was staying in the no-longer-in-existence Drum Rock Inn, to my memory a proper bushveld hotel, complete with morning drumming to wake the guests.
In this hotel, we’d go down for breakfast, and the only thing I remember from this breakfast, and subsequent ones, is the stewed fruit that goes with yoghurt. Now, whenever I move, I crave stewed fruit! But I’ve been making it for my breakfast for a while now, and I absolutely love it.
Just a tip, not to be indelicate, but eat a little at a time otherwise everyone will smell you coming 😉
The ingredients below are a guide. You can play around with it. If you use fresh fruit, you need less water or sugar. If you use dried fruit, as I do, you need the water to both rehydrate and stew. Play around with which fruits you like. I love the apple rings for flavour, the apricots for a bit of sourness and the prunes for sweetness. If you use sugar, you’ll have a beautifully sweet syrup to have with a thick and sour yoghurt, but if you use Rapadura you may have a little less syrup at the end. You could use other sweeteners, but I haven’t tried to.
 You don’t have to use a Thermomix® to make stewed fruit. A nice sized heavy based pot on a stove will do the same job, you may just have to cook it for longer, and stir on occasion.
- 150g fruit - 50g apple rings, 50g apricots, 50g prunes
- 30g sugar / 20g rapadura
- 400g water
- ½ tsp cinnamon and/or vanilla pod
- Add all the ingredients to the Thermomix® bowl.
- Cook Varoma/Spoon Speed/10 mins without the MC
- Remove the fruit and set aside
- Cook the remaining liquid for 5 - 7 minutes, Varoma/Speed 2 (still without the MC) to thicken the liquid into a syrup, but keep an eye on it.
- Pour over fruit.
- Serve with yoghurt, hot or cold.
Price compare your dried fruit ingredients here:
Try this recipe with fresh fruit from Riverford:

Fruit Bottom Compote For Yoghurt
I’m a bit of a boycotter – of companies whose ethics are beyond reprehensible – and as a result I had to give up not one, but two of my favourite brands of yoghurt. I had to learn to make my own though, because once the nicest were no longer an option, it seemed all that was left was the very sugary, the 0% fat, or the artificially sweetened, none of which were ideal to share with my children. (With the exception of Yeo Valley, which I will still buy when I’m buying, because they’re more or less local, I’ve seen their cows with my own two eyes, and they’re actually yum and good for you at the same time. I didn’t know about them when I started making yoghurt, however.)
So the recipe I’m sharing with you now is just for the fruity component of my own fruit bottom yoghurt. For the yoghurt recipe, have a look at yesterday’s post.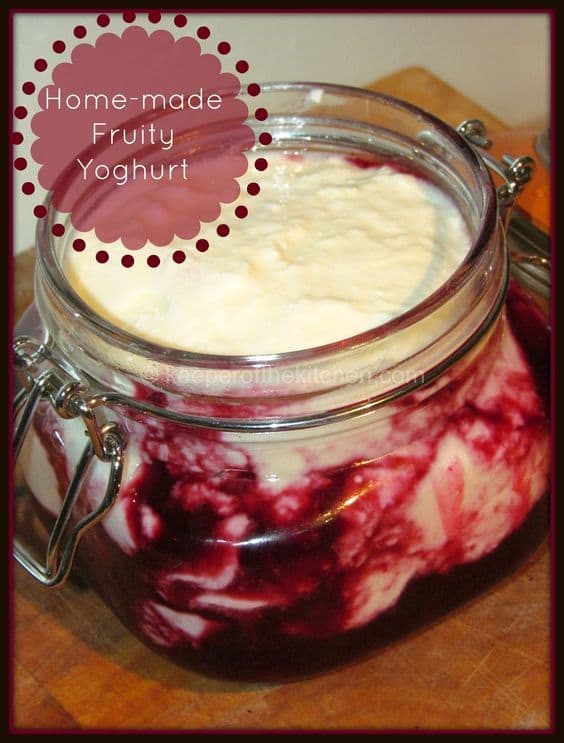
- 100g frozen fruit
- 1 teaspoon brown sugar or rapadura
- 1 teaspoon honey
- Add all the ingredients to the Thermomix® bowl.
- Cook at 70C/Speed Spoon/ 10 mins
- Check that fruit is soft and pour into sieve. Drain off the fluid and pick out some of the whole fruit, avoiding as many seeds as you can. Discard seeds and pulp (or save for fruit leather)
- Pour into container and top with yoghurt.
- Seal and keep in fridge for 2 - 3 days
- Add all the ingredients to the stove and bring to the boil, stirring continuously. You don't want the sugar to burn.
- When fruit is soft, and some liquid has formed, remove from heat,
- Pour into sieve. Drain off the fluid and pick out some of the whole fruit, avoiding as many seeds as you can. Discard seeds and pulp (or save for fruit leather)
- Pour into container and top with yoghurt.
- Seal and keep in fridge for 2 - 3 days
I tend to remove the seeds as far as possible as they get stuck in the yoghurt pouches we use, or worse in my teeth. Quarter fill your yoghurt container with the compote, and top the rest with yoghurt.
Mix it all together before serving, topped with muesli or on it’s own. Yummy, no additive, no preservative, no colouring, no fake sugars. Just good for you, and only cost about 55p to make.
Thick Yoghurt Recipe
 There’s a pretty varied number of ideas, recipes and versions of yoghurt (yogurt in the US) available on t’internet, which can sometimes be really both intimidating and off-putting. I’ve tried a number, and have finally found one I return to again and again. You can find this on the Thermomix® Forums too, but read on for more information and options. (See the bottom of this post for non-Thermomix® recipes)
This is a thick Greek-style yoghurt. I like to whizz up some frozen fruit and mix it with the yoghurt to make the fruity flavoured breakfast favourite that I’d otherwise be spending a fortune on.
When I was in Australia, I found 60 minutes made a good yoghurt. Now I find it makes it a bit grainy and find 50 minutes is perfectly sufficient. I’m not sure if there’s a difference in the milk or if it’s moisture in the air, or what, but try different timings and see what you prefer.
**this post contains affiliate links. Clicking on them will cost you nothing, but I may earn a percentage of the cost of your purchase. You will not pay anything extra**
I’ve recently changed my reusable pouches brand to this one. Check it out!
- 1000g full cream milk - low fat milk will result in a runnier yoghurt
- 50g Greek Yoghurt/from previous batch
- Add the milk to a clean Thermomix® bowl
- Cook the milk for 50 - 60 mins/90/speed 2.
- After 60 minutes, remove the lid and let the milk cool to 37C. This can take 30 - 60 minutes depending on the temperature in the room.
- When it's 37C, add 50g natural yoghurt
- Mix 4 seconds/speed 4.
- Cook for 10 minutes / 37C/speed 2.
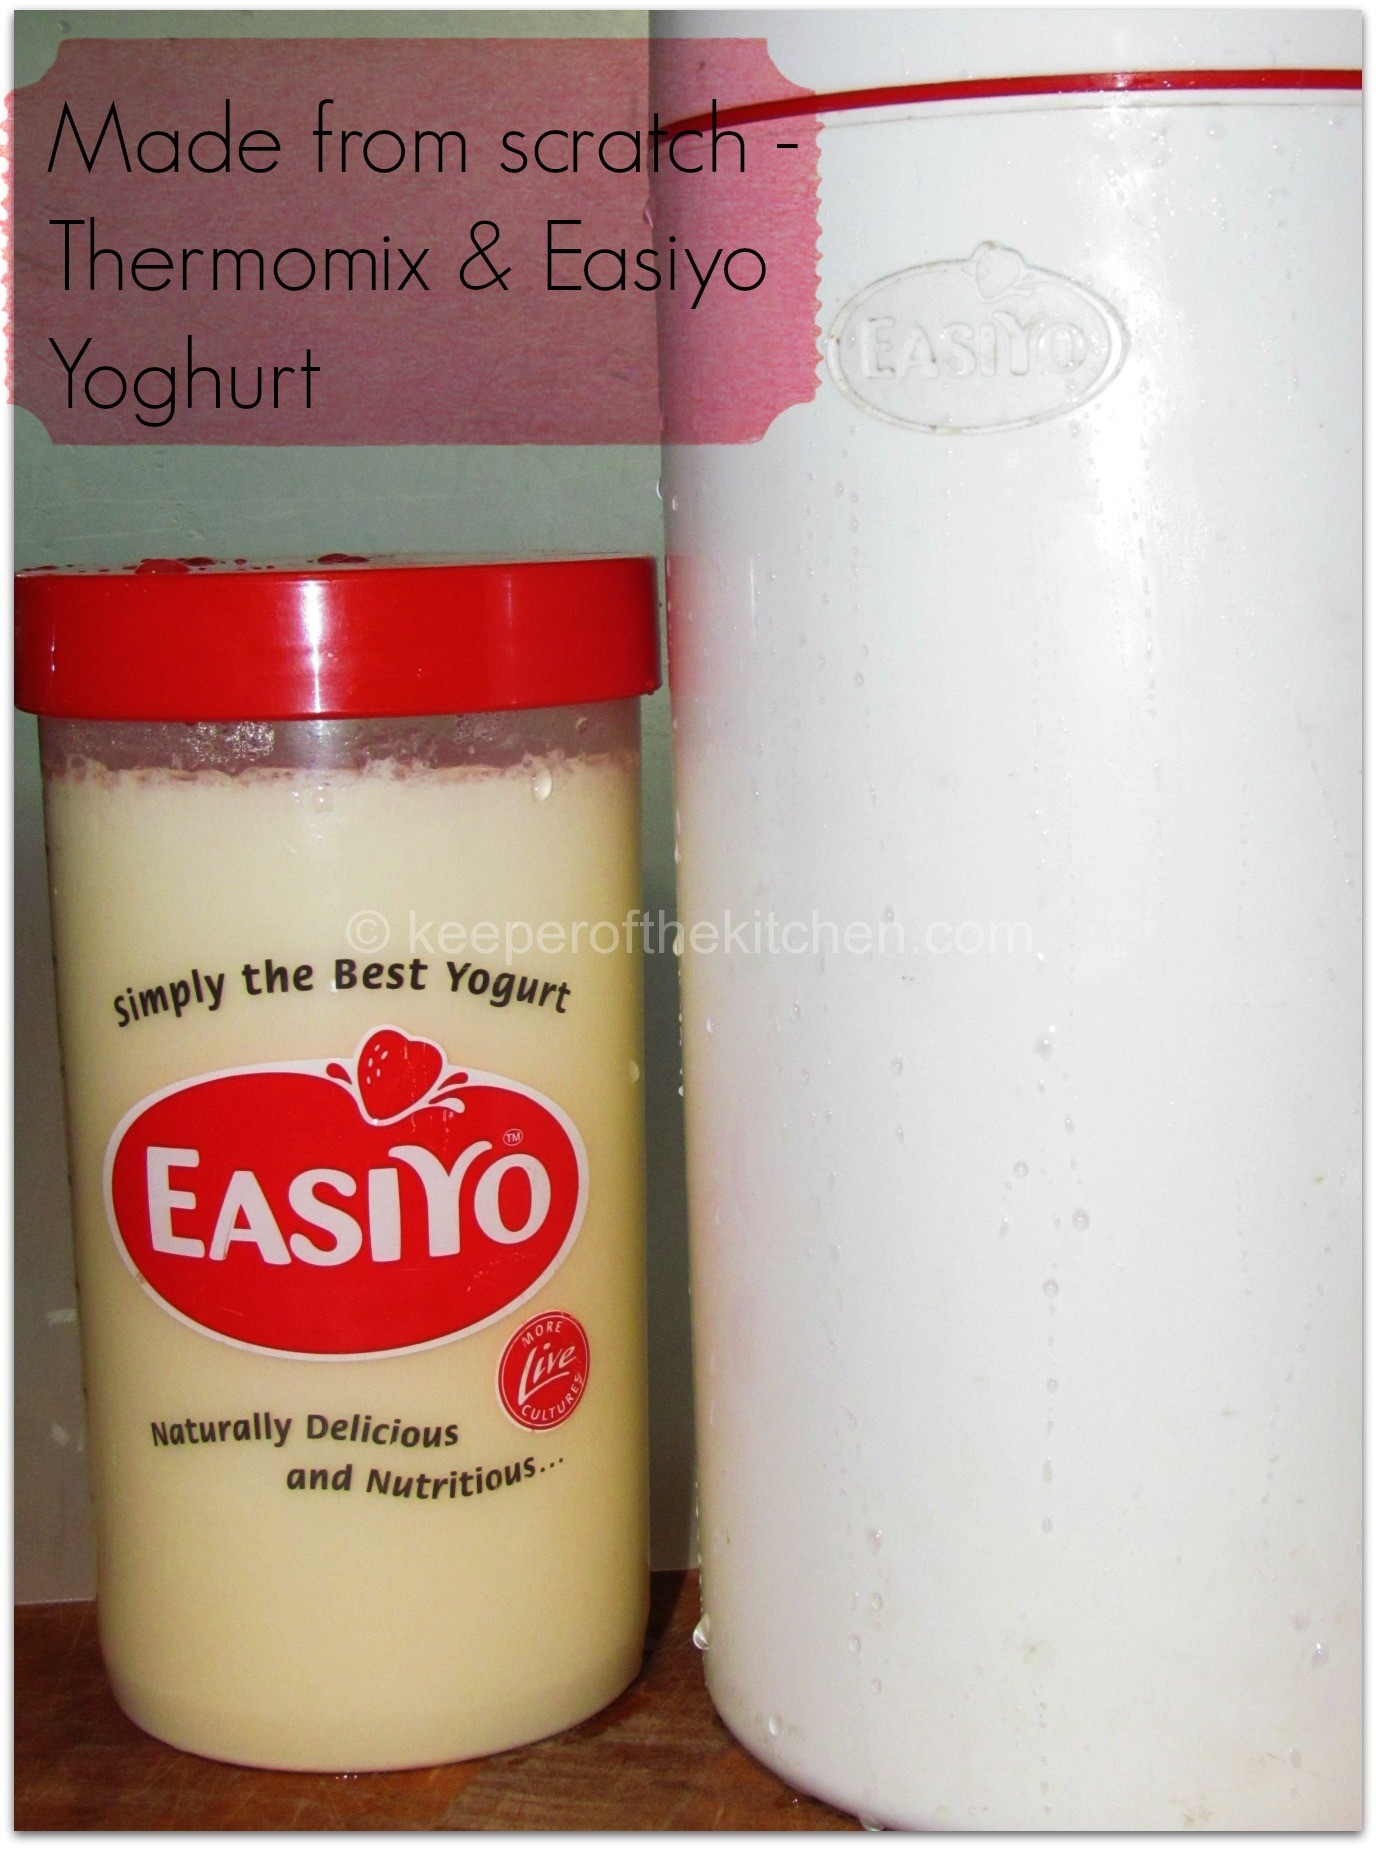
- How you now go about preparing your yoghurt depends on your equipment. I use an Easiyo, so fill the cylinder to the red mark with boiling water. (I normally do this before the final 10 minute cook above, leaving it to cool a little, then when the 10 minute cook is done, the water is a good temperature). Fill the pot with the milk and leave over night.
- Alternatively you could just use a decent Thermos-style insulated flask, leave the yoghurt overnight, and that should work the same way.
- The important thing is not to move the yoghurt while it's doing it's thing. Just pop it in a corner, and leave it for 12 - 24 hours.
I use this Easiyo Yoghurt Maker. I suppose I use it because I have it, but it’s easy enough to make yoghurt without it. That said, I like it. I’ve never had a failure using this, either with the Easiyo starter or just with my own yoghurt. The good thing is people buy these, try them out, then sell them. eBay is full of 99p offerings. I got mine free on Freecycle. It’s very simple to use.
Once the yoghurt is made, I transfer it into Fill n Squeeze pouches, ready for my children to enjoy. The yoghurt freezes really well, so I can take a pouch out of the freezer every evening, ready at my daughter’s table for her to have in the morning. We also use it for daytrips and so on, so I get less requests for ice cream! The reuseable pouches save a fortune, and I’m just thrilled not to buy my girls sugar-and-sweetener-filled yoghurt ‘treats’.
We also use these ice lolly moulds for making frozen yoghurt ‘ice-cream’. Literally, frozen yoghurt, sometimes with fruit. My baby especially loves these and would have them for every meal. There are so many shapes, forms and moulds on the market, but these are a perfect child size – about two or three tablespoons full – so there’s little to no wastage. Each ‘ice cream’ comes apart so you only have to take out one at a time. They’re pricey, except when they’re on sale, and the little connectors snap sometimes when frozen, but they are the best we’ve found for our purposes so far.
Here are some of our favourite toppings for plain yoghurt:
- Nuts and honey
- Muesli
- Raisins and grated apple
- Pureed apple and cinnamon
- 1/2 a pureed banana and 1/2 banana slices
- Pureed berries
- Vanilla pods or essence (buy the proper stuff though, not artificial flavouring)
- Crushed pineapple and coconut
- Chopped and dried mixed fruit
- Sliced or pureed banana
- Chocolate buttons or chips with a squirt of chocolate ice cream sauce or melted chocolate (for a treat)
- Lemon zest (lemon juice might curdle your yoghurt)
- Nuts, raisins, honey and chopped mint
but of course, there’s a world of other options to explore.
If we find ourselves with excess yoghurt, I love making cream cheese from it. While I’ve never had a problem with bought cream cheese, the home made stuff is amazing. Well worth making!
And if you’re making your own cream cheese, you’ll find you have plenty of whey left over. Don’t discard it! There’s a lot you can do with left over whey.
Don’t have a Thermomix®? Try these recipes instead:
- Homemade Thick Crock Pot Yogurt
- Yogurt Sweeteners and Flavours
- Waste-free yoghurt using a pan and a flask
- Yogurt in a Thermoserver
- Easy Machine Yoghurt
- Yogurt: Flu Fighting Food
- DIY: Homemade Yoghurt

